3D print your own cookie cutter!
What’s better during the Holiday season than fresh-baked cookies? Fresh backed cookies in shapes and designs of your own making, of course! Using only free and open-source software, you too can make your own cookie cutters — here’s how.
Step 1: Choose a vector graphic to imprint
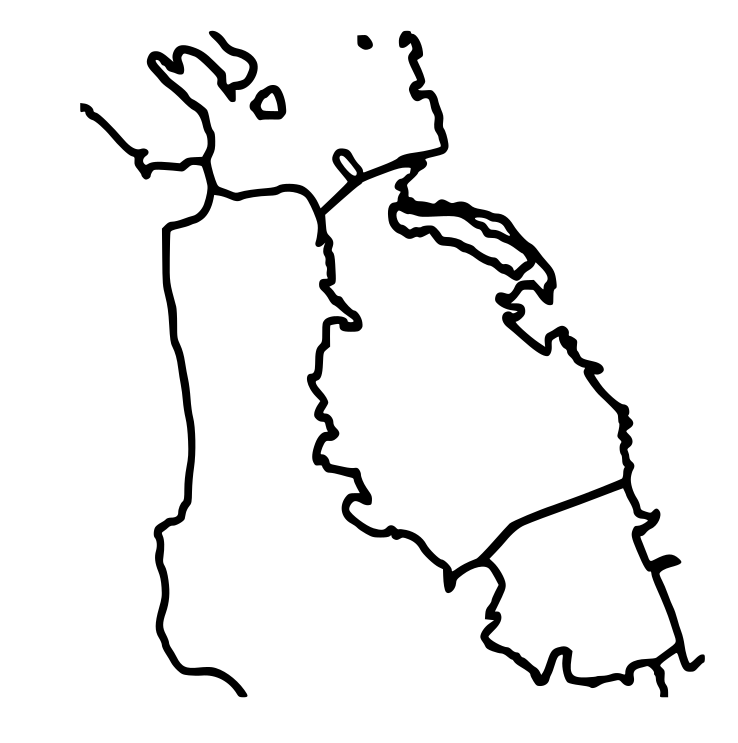
First, we want to choose the shape we want to impress upon our cookie. I’m doing rectangular cookies imprinted with an outline of the SF bay area, but you could do any shape and print pattern. I found an annotated map of the bay area at https://www.researchgate.net/figure/Map-of-San-Francisco-Bay-California-indicating-key-locations-mentioned-in-the-text_fig3_282238231, loaded it into Gimp and cleaned it up a bit: Removed the text labels, evened out the line thickness, and removed some details south of the San Mateo bridge. Inkscape allowed me to convert the bitmap it into a scalable vector graphic (SVG).
Step 2: Model your cookie cutter
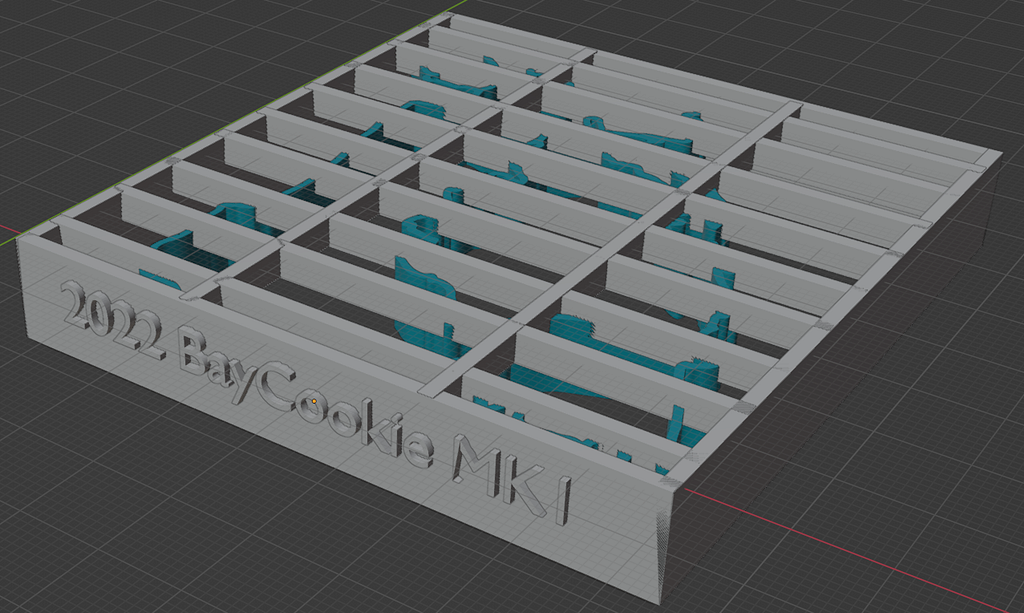
I imported the vector graphic into Blender and scaled the path to 7cm x 9cm before converting it into a mesh in “object mode”. The “extrude” tool then extends the line art about 1cm along the z-axis.
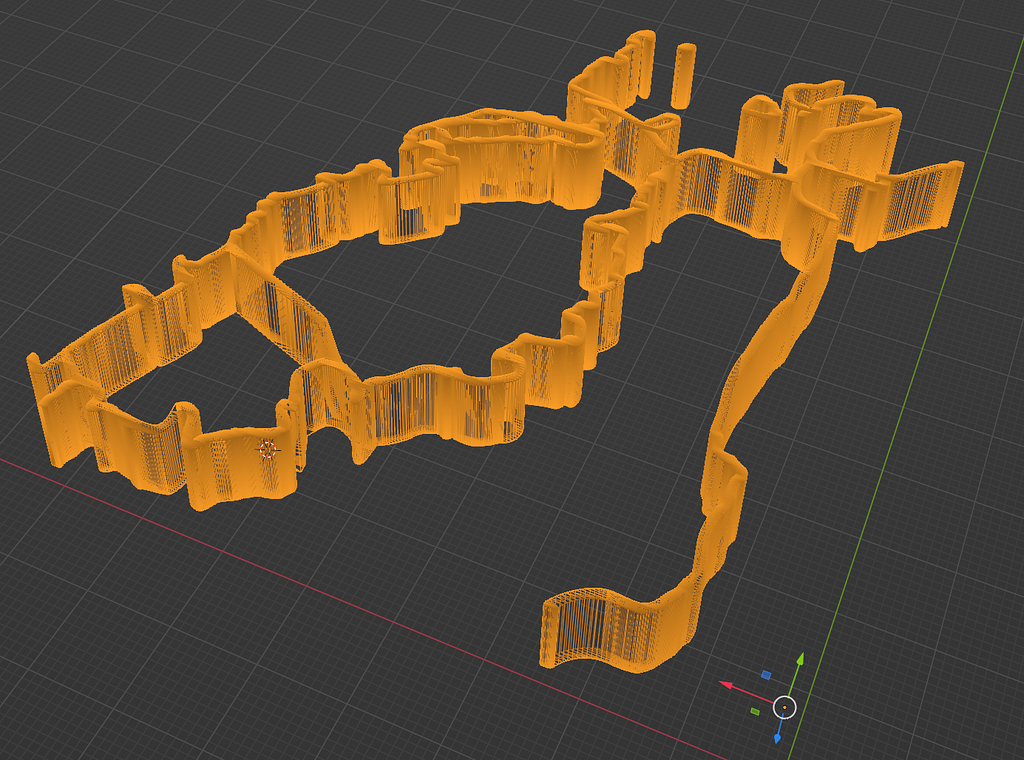
Finally, place cuboids around the perimeter of the extruded outline. In the end, you will want ~5 mm of space between the edge of your rim and the edge of your line art. Depending on how well-connected your design is, you may want to add a few structural supports at the top.
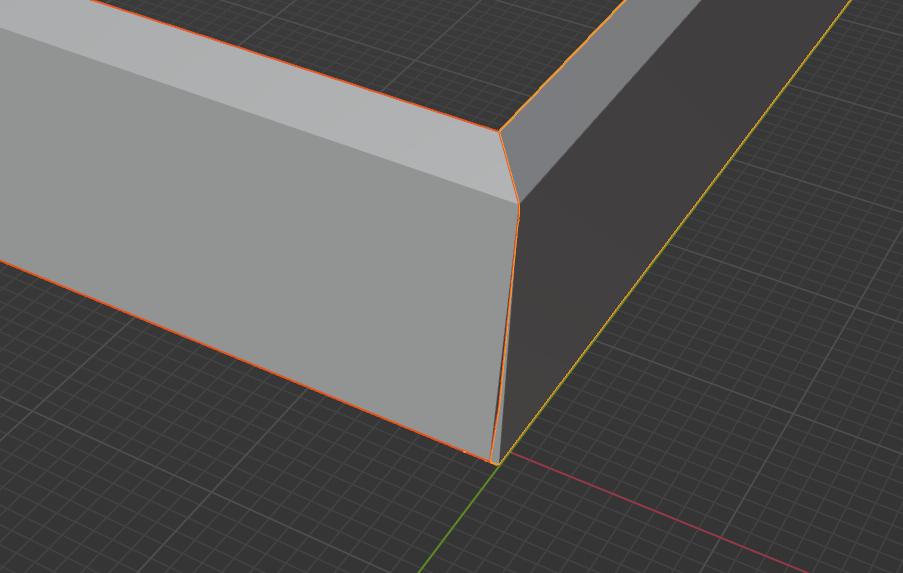
Finally, you will want to use edit mode to create an edge by dragging the inner lip of your rim further away from the line art, and bringing the edges to a point at the corners.
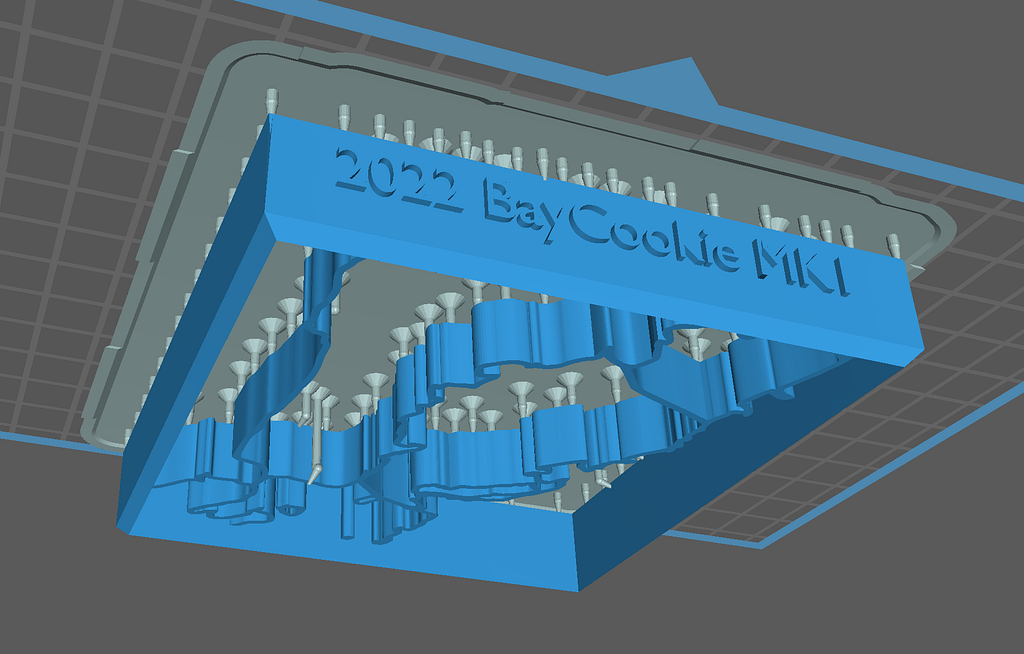
Now join all of the elements into one object, export as a .STL file and into the slicer of your choice! I printed this once without supports and with a backing grid (top picture), but had a hard time removing it from my base plate. I opted to print it with supports (and without the backing grid) afterwards (see bottom picture).
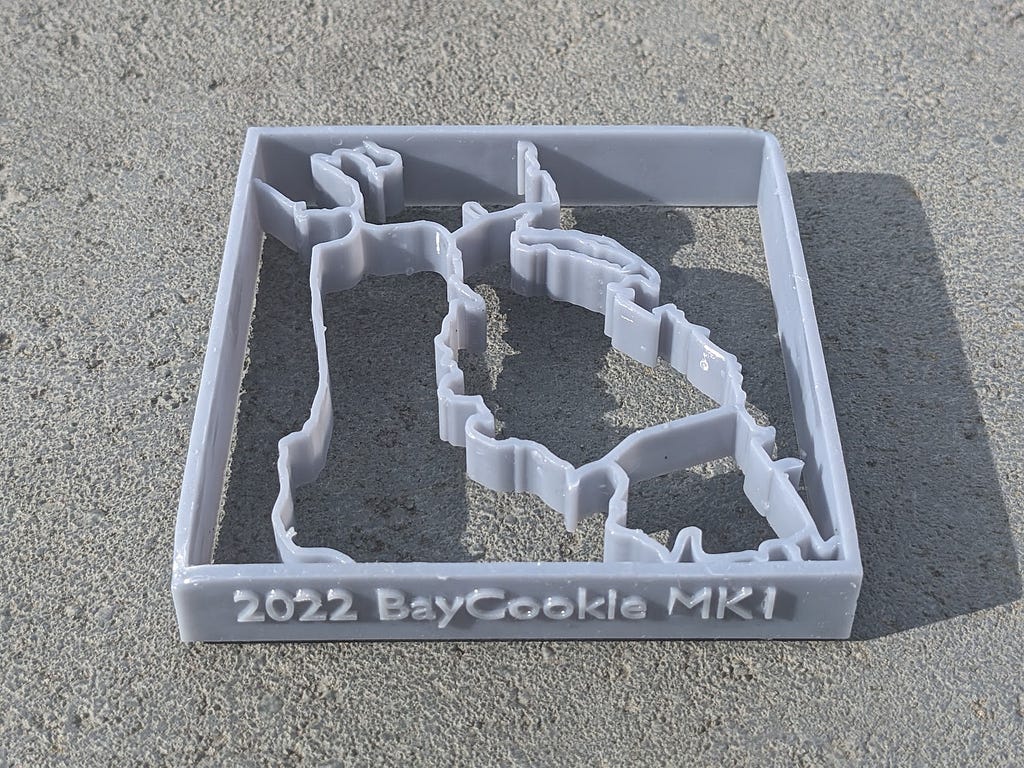
Step 3: Print, Cure, Test, Iterate!
After a quick print + cure and pruning the support we do a first test print.
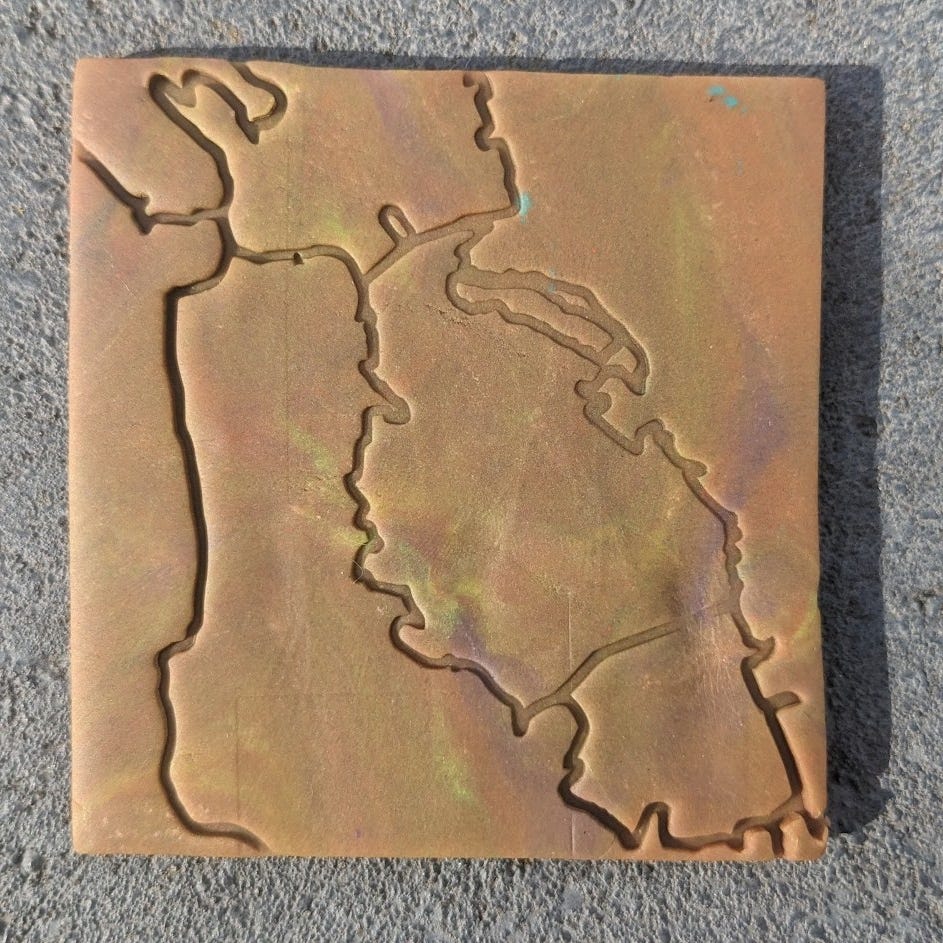
The imprint is true-to-form, and even fine details are persisted. If I try this again, I may want to iterate on a few aspects:
- Since I printed the shape without an internal backing, we lost Angel Island. I really like Angel Island, so I should add an internal support for it.
- The line thickness feels ok for San Francisco, but too thick for Alameda.
- I’d like to try rendering the bridges as two parallel lines to set them apart visually.
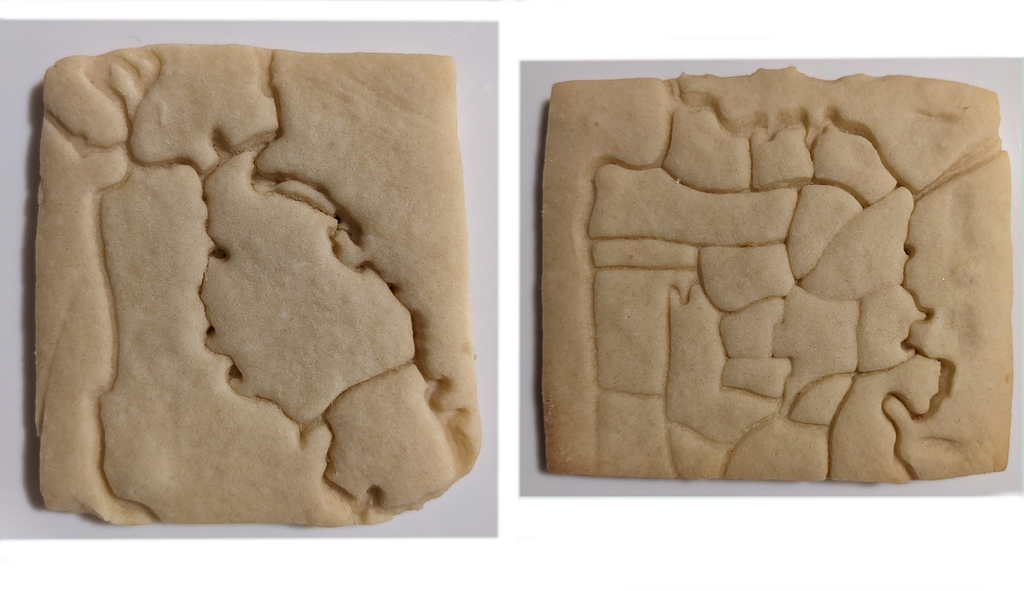
Step 4: Cookies!
I attempted some sugar cookies with the above bay area outline, as well as a San Francisco neighborhood map. Lessons learned:
If you press the decorative lines in too deep, the cookie dough will close them back up when expanding. Instead, try to keep the impression superficial, and it will persist through the rising process.
The dough loves getting stuck in the cutter, and getting the dough out will distort the shapes. It might be worth trying to oil the cookie cutter up before use in the future.